Download Installation Instructions
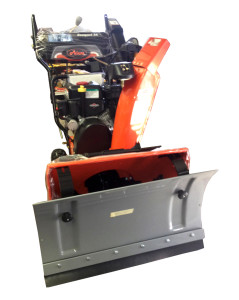
Congratulations on purchasing a new Slush Plow !
This attachment for your snow blower will push snow and slush. The attachment is easy to install using the provided instructions.
Please make sure the size of the plow is larger than the blower housing. If the plow is smaller than the blower housing, please return and purchase the correct size plow. Please be aware the snow blower must have a transmission for this attachment to work. The transmission must be in good condition for the attachment to work. If the transmission slips, take it to a repair shop for a simple fix or adjustment.
WARNING engine must be turned off when installing and uninstalling plow.
INSTALLATION
Before Beginning Installation:
- Always provide Slush Plow with the make/model number of your snowblower before ordering. This will ensure we send you the correct brackets/adapters for installation.
- Measure the height of your snowblower housing. If the vertical distance is less than 20”, contact Slush Plow so we can send you smaller brackets.
- Please make sure the size of the plow is larger than the blower housing.(e.g., a 24” snowblower should use a 30” plow. If the plow is smaller than the blower housing, please
return and purchase the correct size plow.
Snow Plow Chart |
|||
|
|
SNOW BLOWER SIZE |
PLOW SIZE |
|
| 24″ | 30″ | ||
| 26″ | 34″ | ||
| 27″ | 34″ | NOTE: FOR HUSQVARNA PLOWS WILL ONLY FIT 27” SNOW BLOWERS AND UP | |
| 28″ | 34″ & 38″ |
||
| 30″ | 38″ | ||
| 32″ | 38″ | ||
| 33″ | 38″ | ||
| 36″ | 48″ | ||
| 38″ | 48″ | ||
| 45″ | 48″ | ||
- Your snow blower must have a functioning transmission for this attachment to work. If the transmission slips or fails to provide adequate traction, take your snowblower to a repair shop for adjustment prior to installing the Slush Plow.
- Warning: Snowblower engine must be turned off when installing and uninstalling plow.
Assembly/Installation Instructions: Follow the steps below to assemble your Slush Plow and install it on your snowblower.
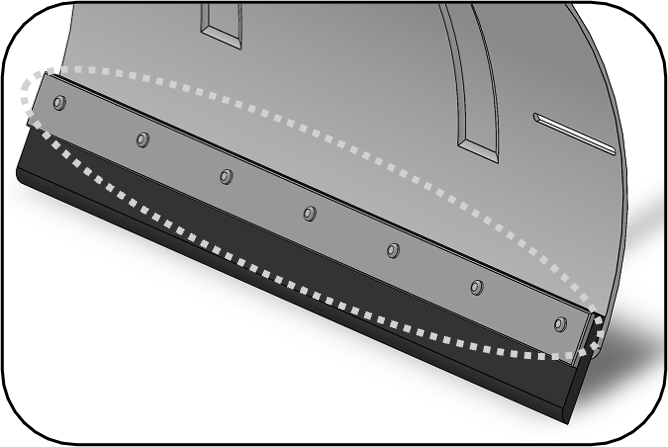
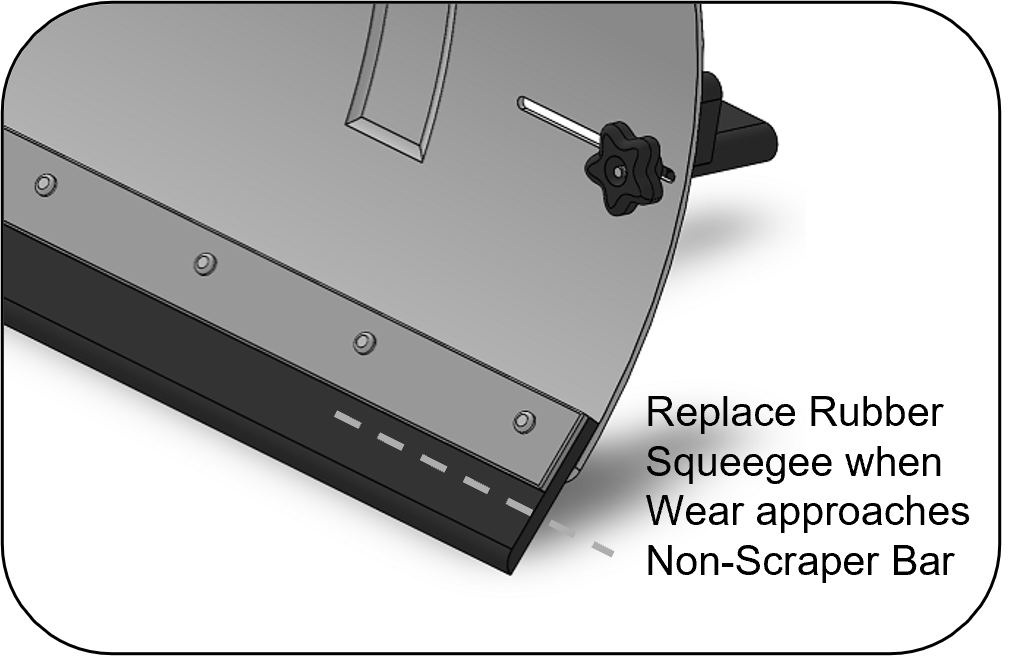
1. Attach the Rubber Squeegee to the plow using the non-scraper bar and 1.5” 5/16-18 Hex Head Bolts and Lock Nuts.
- Ensure that the rubber Squeegee is sandwiched between the plow and the non-scraper bar.
2. Attach Mounting Brackets to the back of the plow using two 1.5” 5/16-18 Carriage Bolts and two Nut Knobs.
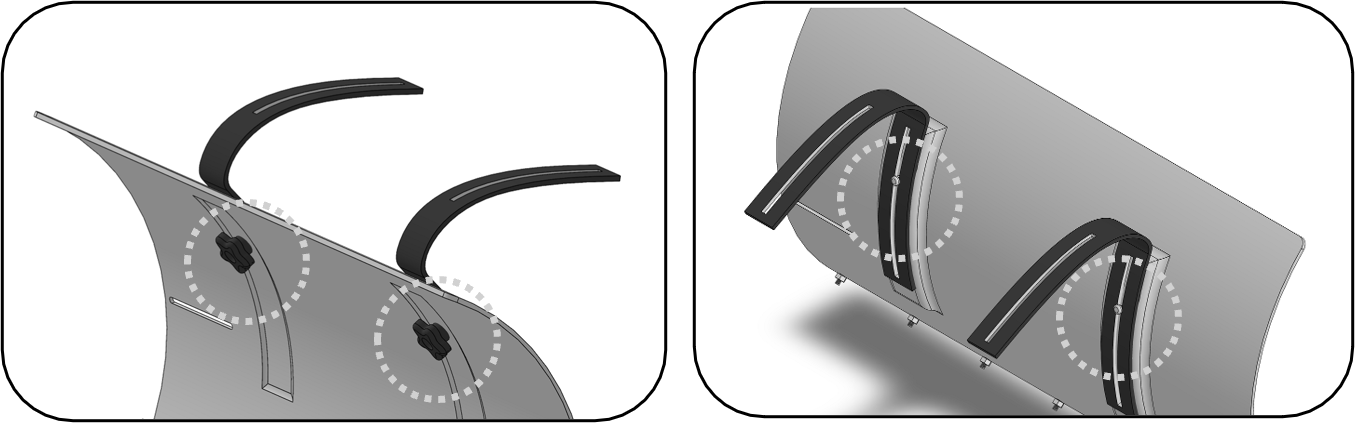
3. Attach Angling Rubbers to the back of the plow using two 4” 5/16-18 Carriage Bolts and two Nut Knobs
4. Prepare the Snowblower for installation.
- Center the provided template on the top of the snowblower housing, and line bottom of the template up with the front edge of the snowblower.
- Tape template in place.
- Cut the red dotted line off the template. Then drill a 5/16 hole.

5. On a level surface, position the assembled Slush Plow in front of the snowblower.
- The plow should be at a 90° angle from the ground
- The edge of the Rubber Squeegee should be flat on the ground
6. If Installing Brackets Inside the Snowblower Housing*: Position metal brackets inside the blower housing, with a Rubber Adapter between the bracket and the snowblower housing
- Position Rubber Adapter so it has the best contact between the bracket and snowblower housing
*For most snowblowers, the brackets should be installed inside the snowblower housing, with Rubber Adapters between the Brackets and the underside of the housing. However, for some snowblowers, it is better to install the brackets outside the housing, with rubber adapters between the Brackets and the top of the housing. Contact Slush Plow to find out which configuration works best for your specific snowblower.
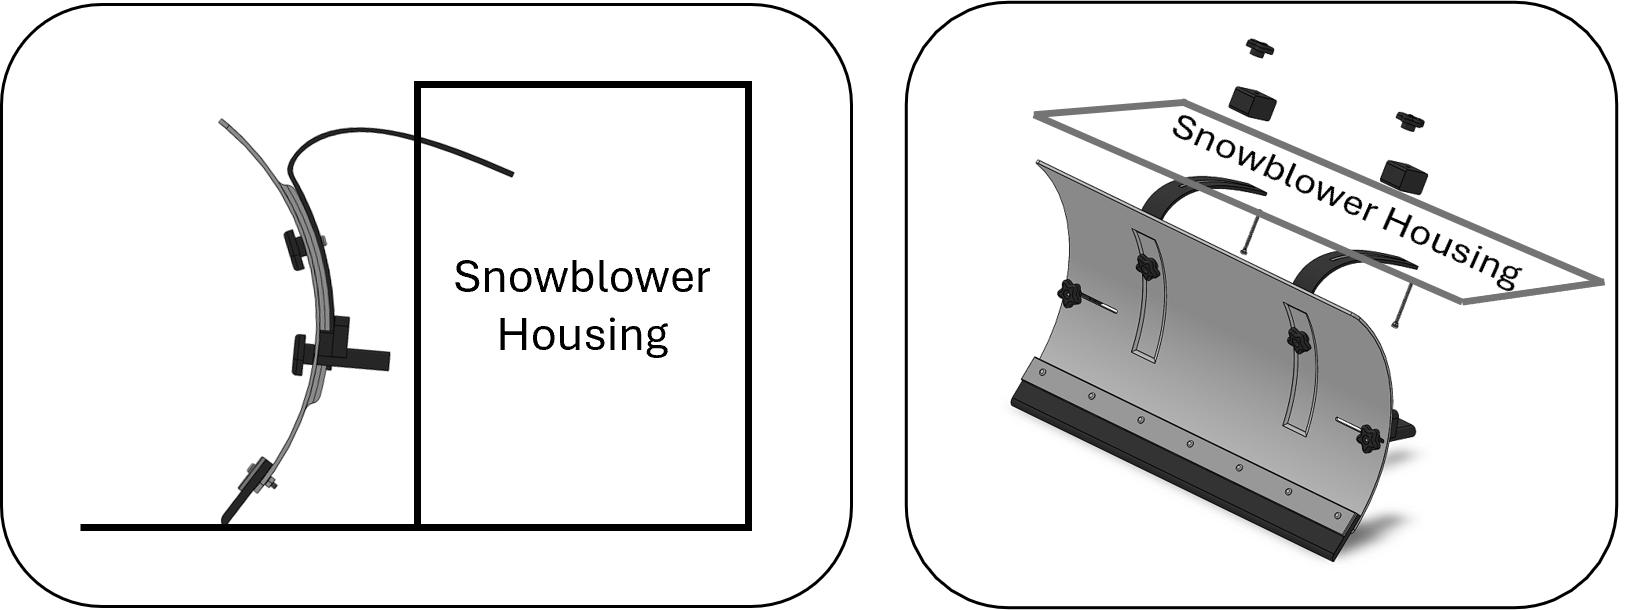
7. Insert two 3.5” 5/16-18 Carriage Bolts up through the bottom of the brackets, passing through the Mounting Brackets, Snowblower Housing, and Rubber Adapters.
8. Use two Nut Knobs to secure the plow to the snowblower housing (Do not fully Tighten).
9. Place the two Angling Rubbers against the snowblower housing.
10. Tighten all six Nut Knobs once plow is in the desired position.
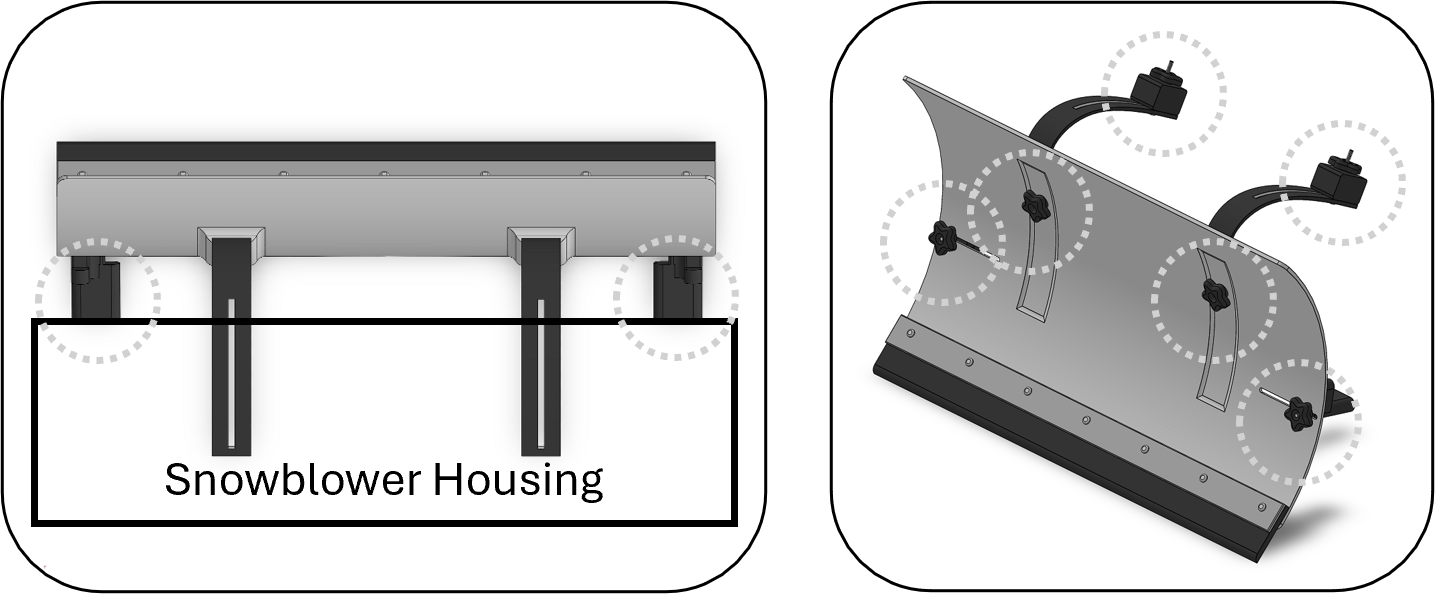
NOTE: Once Installed, there should be a Rubber Adapter/Angler in all contact points between the plow and your snowblower. There should be no metal-on-metal contact points to prevent damage to your snowblower.
Operation: Follow these instructions to safely and correctly operate your Slush Plow-equipped snowblower
- Always loosen all four Nut Knobs connected to the Brackets when adjusting the plow.
- If the Rubber Squeegee wears down to the non-scraper bar, order and install a new Rubber Squeegee
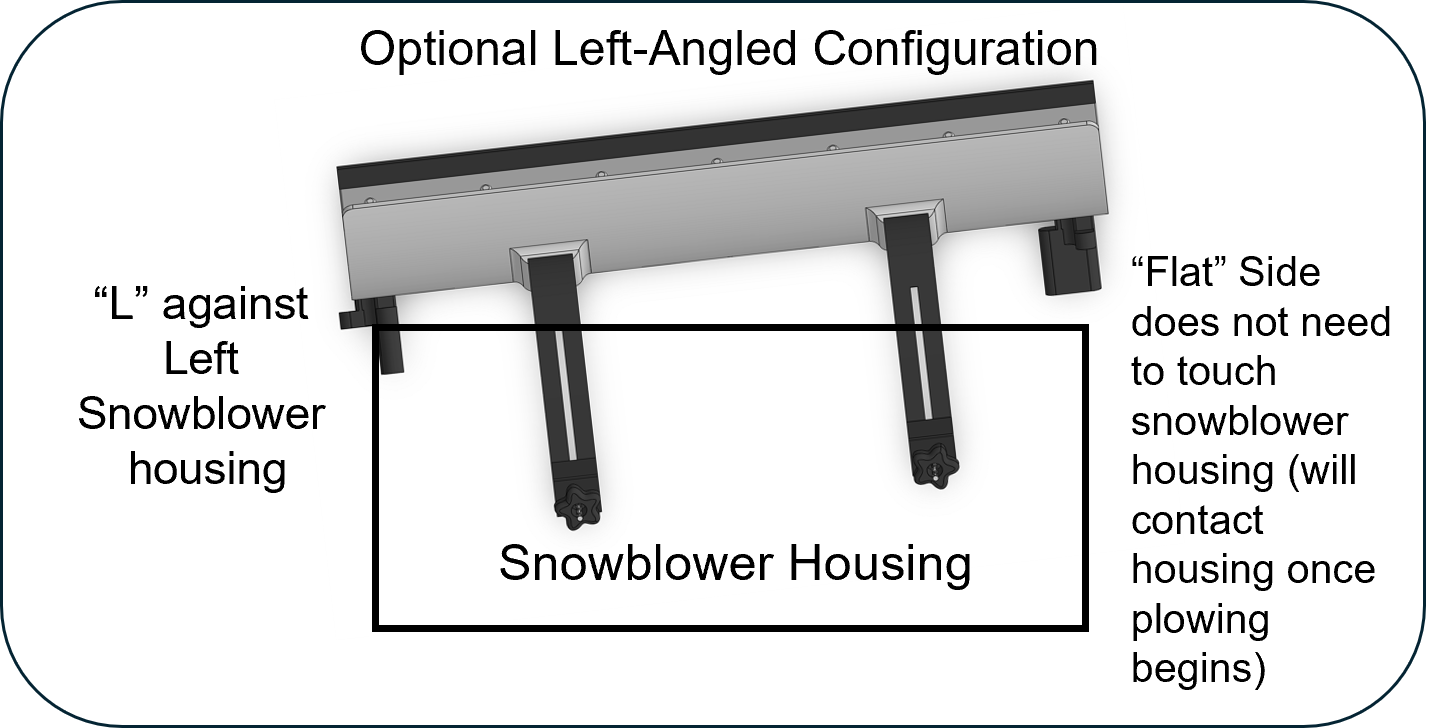
- The angle of the plow can be adjusted several degrees to the left or right. To adjust the angle:
- Loosen all four Nut Knobs connected to the Brackets.
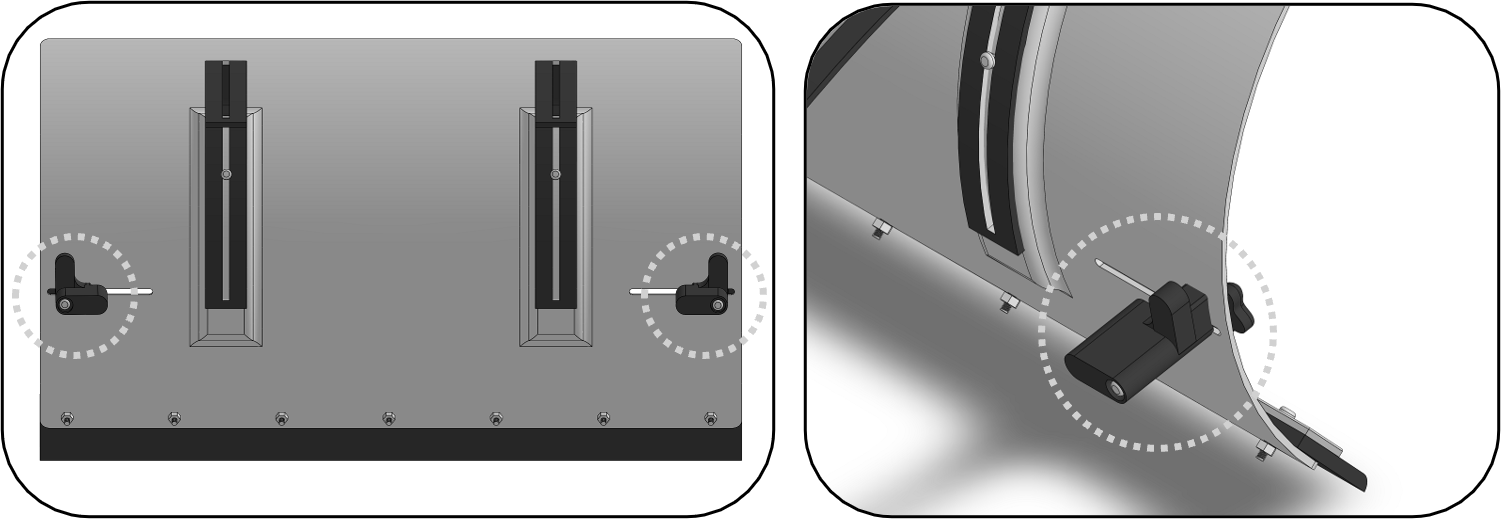
- Angling Rubbers have a Flat Side and an L side. To angle the plow left, rotate the left Angling Rubber to the L side, and rotate the right Angling Rubber to the flat side. Reverse these instructions to angle the plow to the right. In the diagram below, the Angling Rubbers are rotated to angle the plow to the left:
Questions?
For questions or technical assistance, contact Slush Plow Customer service at (516) 806-7512, or send an e-mail to [email protected]